This guide covers the full job: measuring up, preparing the floor, laying insulation and mats, choosing a carpet that lets the heat through, and getting the system signed off and switched on. The system carries a manufacturer warranty for the Ribbon, with the period and conditions stated in AHT’s supplied certificate.
One thing before you start. Laying the mats is genuinely DIY-friendly. The final electrical connection is not. A qualified electrician must connect the system to the mains and certify the work under Part P of the Building Regulations (BS 7671). Plan for that from day one and everything else is straightforward.
Tools and materials checklist
- AHT ribbon heating mats to suit your layout (0.5m wide from £50 per length, or 1m wide at from £65 per length)
- Therm-All insulation roll (£53.50 per 10m² pack)
- touch screen thermostat (£76.50); confirm the supplied floor-sensor contents
- Low-tog underlay rated for underfloor heating (from your carpet supplier)
- Tape measure, pencil and paper (or the free online room designer)
- Sharp knife and straight edge for cutting the insulation roll
- Broom or vacuum for the subfloor
- Tape for insulation joints
- A qualified electrician booked for the final connection and Part P certification
Planning and measuring the room
Get the planning right and the rest of the job is easy. Start with a sketch of the room. Mark anything fixed to the floor, like built-in wardrobes or fitted units. Do not plan heating under those. Heat trapped under fixed furniture is wasted, and leaving those areas cold is standard practice across the industry.
Ribbon can provide primary heating when the usable output from the fitted mats meets the room’s calculated heat loss at the permitted floor temperature. Around 70–80% useful coverage is a planning aim, not a pass/fail test. Confirm the complete heating design before removing existing heating.
The mats come in two widths. 0.5m wide mats run from 1.2m to 7m long and cost £50 for the shortest 0.5m-wide mat (1.2m long). 1m wide mats run from 1m to 3.5m and cost £65 for the shortest 1m-wide length. Narrow mats suit awkward rooms. Wide mats cover big open floors faster.
Carpet is the one exception to a rule that otherwise holds everywhere: the Ribbon needs no gap around the edges of a room and normally runs right up to the walls. With carpet you leave a clear border for the gripper rods, and only because grippers are nailed down and nails and heating mats do not mix. Plan your mats to stop short of the gripper line on every wall. Under any other floor finish, there is no edge gap to leave.
If you would rather not do the maths, use the free room designer. Draw your room and it gives you the whole-mat layout and stock estimate.
What you need
The shopping list is short. Ribbon mats to suit your layout, Therm-All insulation at £53.50 per 10m² pack, and the touch screen thermostat at £76.50. Add a low-tog underlay rated for underfloor heating from your carpet supplier. The full list is above.
Notice what is not on the list. No screed, no self-leveller, no wet trades. The ribbon lays dry, straight onto the insulation. There is more on why that matters in our no-screed guide.
Tools are basic: tape measure, sharp knife for the insulation roll, broom or vacuum for the subfloor. Standard UK delivery is free when the goods total is £150 or more, or £9.99 below that, subject to destination and current checkout terms. Check special destinations with EkoBuild.
Doing the whole job?
The fitting guide covers room planning, floor constructions, Ribbon fitting rules, controls and electrical checks, performance, warranty conditions and current products.
Download the fitting guide (PDF)Step-by-step: how to install underfloor heating under carpet
- Plan your layout. Measure the room, mark fixed obstructions and choose whole stocked mats that physically fit. Ribbon can provide primary heating when the usable output from the fitted mats meets the room’s calculated heat loss at the permitted floor temperature. Around 70–80% useful coverage is a planning aim, not a pass/fail test. Confirm the complete heating design before removing existing heating.
- Prepare the subfloor. Lift the old flooring and clear the subfloor completely. Pull out old staples, nails and gripper tacks, then sweep and vacuum. The surface must be clean, dry and flat before anything goes down.
- Lay the insulation. Lay the specified Therm-All insulation across the full measured insulation area, including the full carpet room area, and tape the joints as instructed. Suitable insulation can reduce downward heat loss. The effect on running cost and warm-up depends on the subfloor, existing insulation, floor finish and controls.
- Roll out the ribbon mats. Roll the mats out over the insulation following your plan. Keep them clear of the gripper line around the room edge and away from fixed furniture. Never cut or shorten the heating element itself, and never overlap mats.
- Fit the floor sensor and route the cables. Place the thermostat floor sensor between two ribbon runs, not on top of one. Route the sensor lead and the mat cold tails back to the thermostat position on the wall.
- Get the electrician in. A qualified electrician connects the mats and floor sensor to the thermostat and the mains, then tests the circuit. This must be done to BS 7671 and certified under Part P. Book it before the carpet goes down, so any fault is found while the floor is still open.
- Fit the protection layer and underlay. Once the electrician has tested everything, cover the mats with a low-tog underlay rated for underfloor heating. Ask your carpet supplier to confirm it suits electric systems before you buy.
- Fit the carpet. Have the carpet fitted as normal, but tell your fitter the floor is heated. No gripper rods, nails or staples anywhere near the mats. If the fitter has not worked over underfloor heating before, walk them through your mat layout first.
- Run the first heat-up. Switch the system on at a low temperature and bring it up gradually while you check the room heats evenly. There is no screed to dry out, so there is no long commissioning wait. Then set your daily schedule on the touch screen thermostat.
Choosing the right carpet and underlay
This is where carpet installs succeed or fail. The heat has to pass through the underlay and the carpet to reach the room. Every layer adds resistance, and that resistance is measured in tog.
Use underlay no higher than 0.8 TOG and keep the combined tog of carpet plus underlay within 2.8. That is the maximum, and 2.5 or less is better still. Ask for the manufacturer’s tested TOG rating; appearance or thickness alone does not establish thermal resistance. Ask your carpet supplier to confirm that both the carpet and the underlay are suitable for electric underfloor heating before you order. Obtain the product-specific specifications before fitting.
Check the underlay’s tested TOG rating and approval for the complete electric underfloor-heating construction. Material, thickness and feel alone do not establish its thermal resistance or suitability.
Check the manufacturer's electric underfloor-heating guidance for your exact carpet as well as the combined TOG rating. Keep the product specifications and tested TOG values in case you change the carpet later.
Common mistakes to avoid
These are the errors that damage mats or leave rooms lukewarm. All of them are avoidable.
- Gripper rods through the mat. Grippers are nailed into the floor, and a nail through a mat ruins it. Plan the mats to stop short of the gripper line on every wall, and tell your carpet fitter the floor is heated before they start.
- High-tog felt underlay. It insulates the room from your heating. Use a low-tog underlay rated for underfloor heating, nothing else.
- Heating under fixed furniture. Wasted money and trapped heat. Plan around wardrobes and fitted units from the start.
- Cutting or shortening the heating element. You can plan mats to fit almost any room shape, but the heating element itself must never be cut. If your layout does not work, change the mat sizes, not the mat.
- Connecting it yourself. The final connection is a job for a qualified electrician, certified under Part P (BS 7671). No exceptions.
- Carpet down before testing. Have the electrician test the system while the floor is open. Finding a fault after the carpet is fitted means lifting it again.
What it costs: a 14m² lounge example
A 4m × 3.5m lounge has a full room area of 14m². Measure the heating outline separately between the inner edges of the gripper rods and mark any exclusions. Whole mats must fit that smaller measured shape; a five-metre mat cannot fit either straight dimension and must not be cut.
The Room Designer uses the full 14m² area for the insulation allowance, rounded up to two 10m² Therm-All rolls. It prices the whole stocked mats that fit and the controls for the allocated zones. Check the actual product list rather than deriving a package from room area alone.
Carpet, compatible underlay, tape quantities, any additional connection materials and electrical work are outside the listed heating-product total. Confirm underlay at no more than 0.8 TOG and combined carpet plus underlay at no more than 2.8 TOG.
Still deciding rather than fitting? Can you put underfloor heating under carpet without screed answers the tog question, the build-up height and whether it can be the room's main heating.
Next steps
Every room is different, which is why we built the room designer. Draw your room and it gives you the whole-mat layout and stock estimate in minutes. You can browse the full range in the shop, or read the complete electric underfloor heating guide if you are still comparing systems.
Not sure about something in your room? Call us on 01244 822 918. We are EkoBuild, AHT amorphous ribbon specialists based in Flint, North Wales, and we would rather answer a question before you order than after. Every system carries a manufacturer warranty for the Ribbon, with the period and conditions stated in AHT’s supplied certificate.
FAQs
Can you fit electric underfloor heating under carpet?
Yes, with the right system. The AHT ribbon mats are 1.8mm thin and lay directly under carpet with no screed or self-leveller. You lay insulation, roll out the mats, add a heating-rated underlay, then fit the carpet on top.
What tog rating should carpet and underlay be for underfloor heating?
The underlay must be no higher than 0.8 TOG, and the combined carpet and underlay must stay within 2.8 TOG. Aim for 2.5 or less and more heat reaches the room. Check the manufacturer’s tested TOG figures rather than judging by material, thickness or feel. Always confirm suitability with your carpet supplier before you buy.
Can underfloor heating under carpet be my main heating?
Ribbon can provide primary heating when the usable output from the fitted mats meets the room’s calculated heat loss at the permitted floor temperature. Around 70–80% useful coverage is a planning aim, not a pass/fail test. Confirm the complete heating design before removing existing heating.
Do I need an electrician to install underfloor heating?
Yes, for the final connection. Laying the insulation and mats is DIY-friendly, but the connection to the thermostat and mains must be made by a qualified electrician and certified under Part P of the Building Regulations (BS 7671). Budget for this when you plan the job.
Do I need screed or self-leveller under carpet?
No. The AHT ribbon system lays dry, directly under the flooring, so there are no wet trades, no drying time and minimal added floor height. Once your electrician has connected and tested the system, the carpet can go straight down.
See the heating and flooring samples
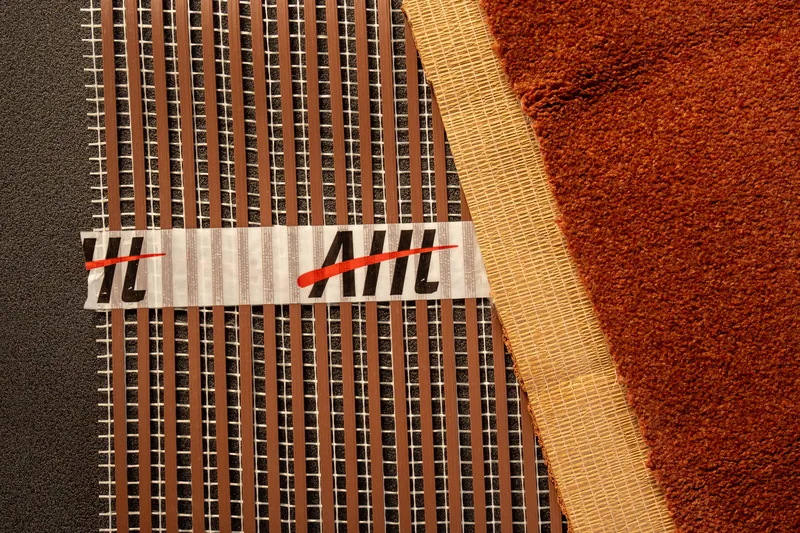
A closer look at the demonstration samples. Confirm the complete floor build-up, controls and installation requirements for your chosen products.